React Introduction
So far, we have seen how to work with / render API data using native JavaScript code with Bootstrap 5.1. This technique focused on modifying the DOM directly by working with Elements and their properties such as innerHTML and methods like addEventListener(). We also made regular use of Template literals and Array properties / methods in order to generate new HTML to be added to the DOM and rendered.
The strategy employed was to design a complete page, examine its contents in the DOM, and write JavaScript code to manipulate it based on user actions. To store data for the page, it would be declared in the associated JavaScript file, or added to elements of the page using "data-*" attributes.
This works well for smaller web applications such as our example, however as applications grew more complicated, a modern, scalable approach needed to be developed. This led to the creation of the "MVVM" or "Model View ViewModel" design pattern and tools such as Knockout, Ember and Angular.js gained popularity.
MVVM
From the official Knockout documentation:
Model: your application’s stored data. This data represents objects and operations in your business domain (e.g., bank accounts that can perform money transfers) and is independent of any UI. When using KO, you will usually make Ajax calls to some server-side code to read and write this stored model data.
View Model: a pure-code representation of the data and operations on a UI. For example, if you’re implementing a list editor, your view model would be an object holding a list of items, and exposing methods to add and remove items.
Note that this is not the UI itself: it doesn’t have any concept of buttons or display styles. It’s not the persisted data model either - it holds the unsaved data the user is working with. When using KO, your view models are pure JavaScript objects that hold no knowledge of HTML. Keeping the view model abstract in this way lets it stay simple, so you can manage more sophisticated behaviors without getting lost.
View: a visible, interactive UI representing the state of the view model. It displays information from the view model, sends commands to the view model (e.g., when the user clicks buttons), and updates whenever the state of the view model changes.
This concept drastically changed how to think about the designing sites / applications on the web. By introducing this "Separation of Concerns", we can create code that is modular, reusable and testable.
In 2011 Facebook employee Jordan Walke created an early prototype of React called "FaxJS" which focused on creating "components", essentially providing the "view model" and "view" for reusable pieces of a User Interface (UI). Multiple components would then be combined to create a functional web site / app.
Quick Note: "Web Components" are now standardized and available in modern browsers. Please refer to the MDN Documentation for more information.
In 2013, React was released as open source and has steadily grown in use among developers, even surpassing popular frameworks like Angular and Vue in metrics such as Questions per Month on Stack Overflow and Most commonly used Web Framework in the 2021 Stack Overflow Survey of over 67,000 professional developers.
Getting Started
To get started creating applications with React, technically all we need to do is to add some scripts to an existing HTML page and start creating and rendering our components, ie:
<h1>React</h1>

<!-- We will put our React component inside this div. -->
<div id="main_container"></div>

<!-- Load React. -->
<!-- Note: when deploying, replace "development.js" with "production.min.js". -->
<script src="https://unpkg.com/react@18/umd/react.development.js" crossorigin></script>
<script src="https://unpkg.com/react-dom@18/umd/react-dom.development.js" crossorigin></script>
<script src="https://unpkg.com/babel-standalone@6/babel.min.js"></script>

<script type="text/babel">
    'use strict';

    // Hello Component
    function Hello(props){
        return <p>message: {props.message}</p>
    }

    // Main Component
    function Main() {
        return (
            <div>
                <Hello message='Hello World' />
                <Hello message='This is a test' />
            </div>
        );
    }

    const root = ReactDOM.createRoot(document.querySelector('#main_container'));
    root.render(React.createElement(Main));
</script>
However, we will be building larger apps and while adding React to an Existing Project is indeed possible (as we have seen above), we would prefer to use something that scales better and gives a superior development experience. Here, the idea of "Toolchains" comes into play, ie:
"A set of programming tools that is used to perform a complex software development task or to create a software product"
When working with React, this will typically be things like Webpack, Babel, ESLint and Jest among many others. Fortunately, there are frameworks available for us to use that have these "toolchains" correctly configured and optimized. For example:
- React Router: "The most popular routing library for React and can be paired with Vite to create a full-stack React framework. It emphasizes standard Web APIs and has several ready to deploy templates for various JavaScript runtimes and platforms."
- Next.js: "A popular and lightweight framework for static and server‑rendered applications built with React. It includes styling and routing solutions out of the box, and assumes that you’re using Node.js as the server environment."
- Gatsby: "The best way to create static websites with React. It lets you use React components, but outputs pre-rendered HTML and CSS to guarantee the fastest load time."
- Many others including: Remix, Expo, etc.
Next.js
For this course, we will be choosing Next.js, which describes itself as "the best developer experience with all the features you need for production: hybrid static & server rendering, TypeScript support, smart bundling, route pre-fetching, and more. No config needed". This sounds perfect for our purposes, so why don't we get started and see what the starter app looks like for Next.js.
To begin, create a new folder on your machine and open it using Visual Studio Code. Next, open the Integrated Terminal and (assuming that you want to create a new app (and folder) named “my-app”) execute the command:
npx create-next-app@15 my-app --use-npm
You will then be asked to make some decisions regarding what to include in your new app (for now, we will chose the following values (ie: the only option that we will say "Yes" to, is the ESLint option):
? Would you like to use TypeScript? … No / Yes
? Would you like to use ESLint? … No / Yes
? Would you like to use Tailwind CSS? … No / Yes
? Would you like your code inside a src/ directory? … No / Yes
? Would you like to use App Router? (recommended) … No / Yes
? Would you like to use Turbopack for next dev? … No / Yes
? Would you like to customize the import alias (@/* by default)? … No / Yes
The process will create a new folder called “my-app”, with the code needed to get started using Next.js. Once it finishes its initial setup (downloading dependencies, etc), you can view the starter site immediately by executing the commands:
cd my-app
npm run dev
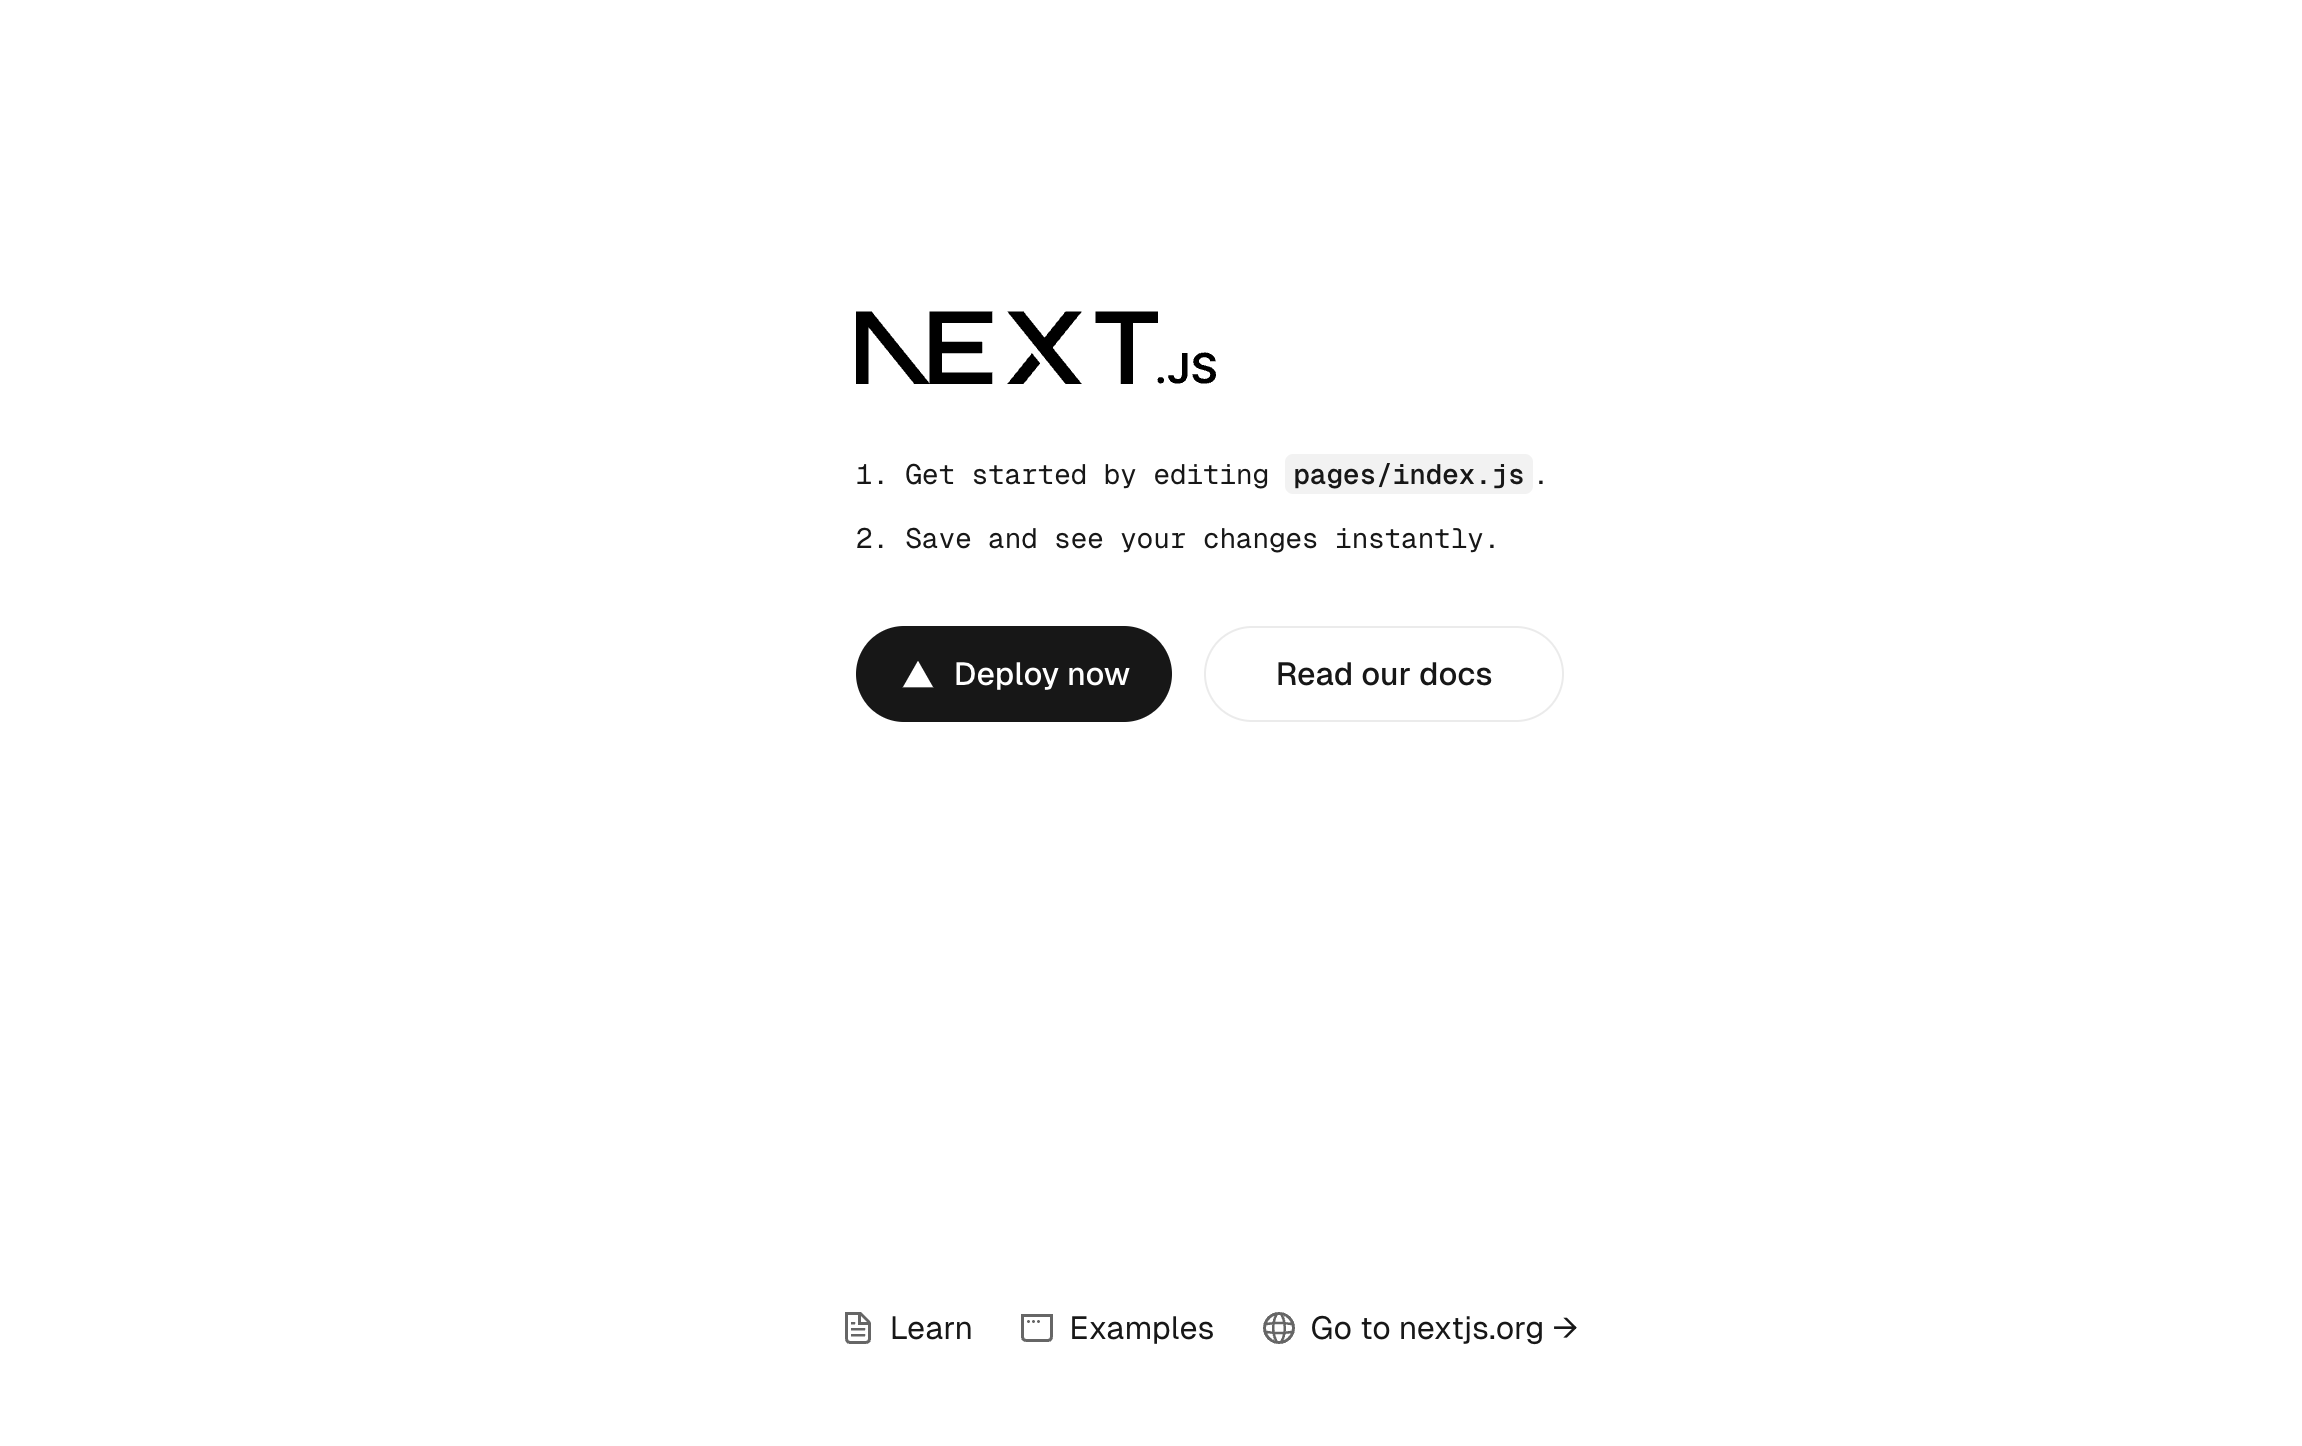
This will start a development server on localhost on port "3000" (http://localhost:3000) and when opened in the browser, should look something like this:
File Structure
Now that we know how to create a "Next.js" app, let's walk through some of what was created during the "create-next-app" process. If you open the file explorer tab in Visual Studio Code, you should see the following:
📦 my-app
 ┣ 📂 node_modules
 ┣ 📂 pages
 ┃ ┣ 📂 api
 ┃ ┃ ┗ hello.js
 ┃ ┣ _app.js
 ┃ ┣ _document_.js
 ┃ ┗ index.js
 ┣ 📂 public
 ┃ ┣ favicon.ico
 ┃ ┣ file.svg
 ┃ ┣ globe.svg
 ┃ ┣ favicon.js
 ┃ ┣ next.svg
 ┃ ┣ vercel.svg
 ┃ ┗ window.svg
 ┣ 📂 styles
 ┃ ┣ globals.css
 ┃ ┗ Home.module.css
 ┣ .gitignore
 ┣ eslint.config.mjs
 ┣ jsconfig.json
 ┣ next.config.mjs
 ┣ package-lock.json
 ┣ package.json
 ┗ README.md
At first, we will not be touching many of these files and will be adding more folders and files to this structure in the near future. For the time being however, let's discuss the following areas already created for us:
"pages" Folder: This folder is responsible for containing the components that will act as "routes" for our application, ie: any file added to the "pages" directory is automatically available as a route. For example, currently we have an "index" route, ie "/" - this file (index.js) is where we find the "Home" component, which contains the code to render our "Welcome to Next.js!" page.
Additionally, we have an "api" folder, currently containing the file "hello.js" with the code to return
{"name":"John Doe"}at the route "/api/hello"."public" Folder: This is where we will keep any static resources for our app / site. For example, you can see that one of the files contained therein is "next.svg" - this file is referenced in the "Home" component (index.js) with the code:
<Image
  className={styles.logo}
  src="/next.svg"
  alt="Next.js logo"
  width={180}
  height={38}
  priority
/>"styles" Folder: As the name suggests, this is where we will be storing our .css files for the application. At the moment, you will find two files:
"globals.css": referenced in the "_app.js", the file containing the top-level "App" component (discussed later)
"Home.module.css": referenced in the "index.js" file, used by the "Home" component.
NOTE: The ".module.css" extension identifies the file as a "CSS Module" which will "locally scope CSS by automatically creating a unique class name. This allows you to use the same CSS class name in different files without worrying about collisions."